By Liz King, Ben Klinge, Dean Kidder-Buell, and Marilynn Hunt
A rube goldberg machine is a series of steps that are used to do a simple task, in a complicated way. The requirements for this project was to have ten steps, use five of the six simple machines, and have at least four energy transfers.
Concepts
|
Simple Machines
There are six different simple machines. One of the requirements of our project was to include five of the six machines. My group used all of them, except for a wedge, and used other simple machines more than once. Screw- an inclined plane that wraps around in circles Pulley- makes lifting loads easier by using rope and a wheel Inclined Plane- a sloped surface that connects a high and a low point Lever- a bar that rests on a fulcrum to make lifting loads easier Wheel and Axle- a wheel that spins on an axle to move objects Wedge- an object with one slanted side, used either to cut things apart or hold something in place |
Calculations
My group calculated velocity, mechanical advantage, energy transfers, kinetic energy, potential energy, speed, and force for our rube goldberg. Each step of our machine has a calculation that explains a part of its physics to go with it. (Look at the slideshow below to see our full calculations and to see which equation goes with what step.)
|
Overview
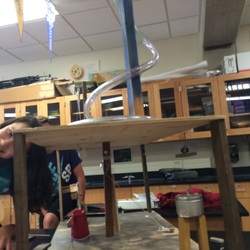
We were given a few weeks to create a rube goldberg machine. My group decided to have our end product be stapling a piece of paper. This was not always our end product though. Originally we were going to take a photo on somebody's phone, but that proved to be a common task among our class and very difficult, so we decided to change it. One of the first things we did was draw our schematic. We planned to use all of the simple machines except for the wheel and axle, and decided which step to incorporate each machine. Our group did not end up using a wedge as our fifth simple machine. Instead we used a wheel and axle in the form of a toy car. As the days went by, we realized that our design was a bit to complicated for the amount of time we had left to complete the project. This led to our decision of changing about half of our original schematic.
Our rube goldberg machine is two stories. We ended up changing the entire bottom floor. Having our project be two stories caused a few problems. The whole machine wobbled and was unstable, so we changed the legs of the project from PVC piping to wood. After stabilizing our project we started to build. The steps we spent the most time on were the pulley and the dominoes. We had a very difficult time finding the correct mass to make the pulley work, and the dominoes did not always fall. They were originally all wood. We had to use some glass dominoes because some of the wooden ones were not heavy enough to knock down the dominoes in front of them.
We had finally done it. After many weeks of hard work and determination, we had created our own rube goldberg machine. It took a lot of patience and perseverance, but we managed to complete it on time. Our group came in at lunch everyday on the week of the presentation. We still had minor fixes to deal with. I was surprised when we finished on time. Here are the ten steps to our machine: the screw, the pulley, the hammer, the inclined planes, the lever, the dominoes, the pendulum, the car and cup, the string of weights, and the weight and stapler.
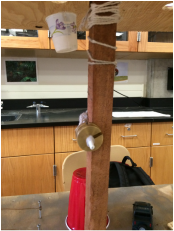
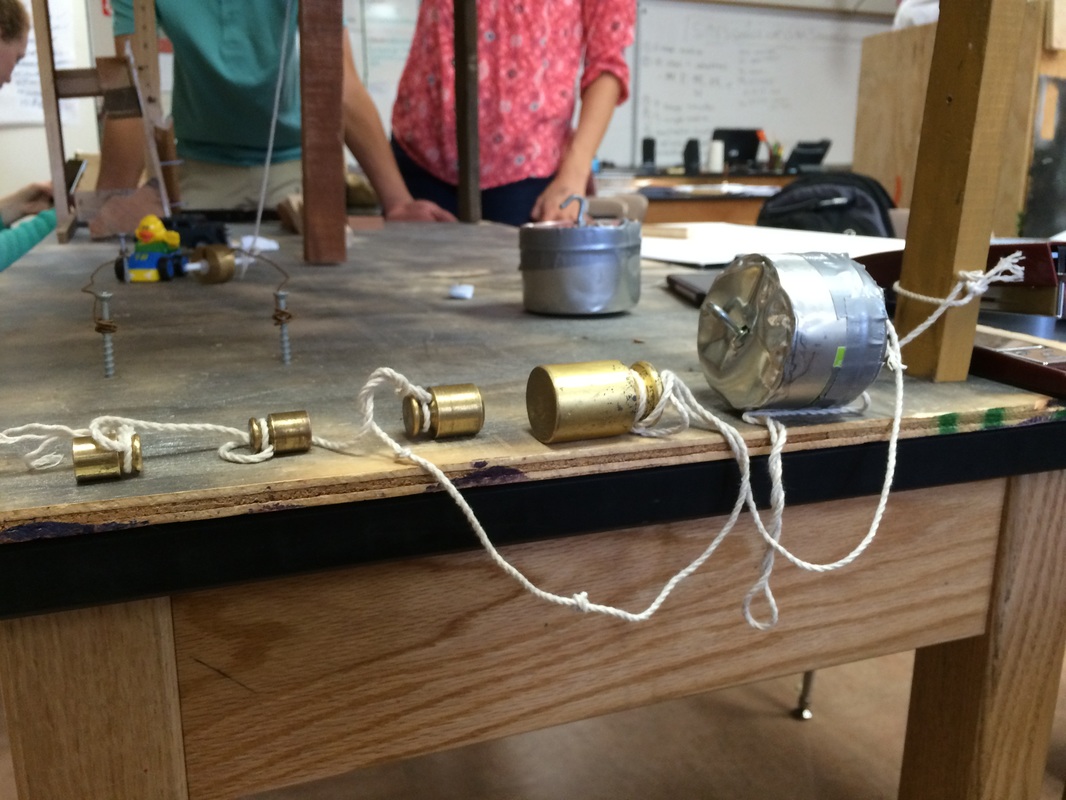
Step By Step: 1. Marble goes through screw→hits a big metal marble→metal marble falls into a cup, setting off the pulley→ 2. pulley rises and hits a lever→the lever releases the hammer→ 3. hammer falls and hits a small metal marble→ 4. marble goes down two inclined planes→ 5. marble hits another lever→ 6. lever knocks over the dominoes→ 7. tallest domino releases the pendulum→pendulum swings around to hit the cup→ 8. cup releases the wind-up car→car pushes the string of weights→ 9. weights fall off the desk→weights pull one of the wood supports→ 10. big weight falls on the stapler→stapler stables the paper.
Our rube goldberg machine is two stories. We ended up changing the entire bottom floor. Having our project be two stories caused a few problems. The whole machine wobbled and was unstable, so we changed the legs of the project from PVC piping to wood. After stabilizing our project we started to build. The steps we spent the most time on were the pulley and the dominoes. We had a very difficult time finding the correct mass to make the pulley work, and the dominoes did not always fall. They were originally all wood. We had to use some glass dominoes because some of the wooden ones were not heavy enough to knock down the dominoes in front of them.
We had finally done it. After many weeks of hard work and determination, we had created our own rube goldberg machine. It took a lot of patience and perseverance, but we managed to complete it on time. Our group came in at lunch everyday on the week of the presentation. We still had minor fixes to deal with. I was surprised when we finished on time. Here are the ten steps to our machine: the screw, the pulley, the hammer, the inclined planes, the lever, the dominoes, the pendulum, the car and cup, the string of weights, and the weight and stapler.
Step By Step: 1. Marble goes through screw→hits a big metal marble→metal marble falls into a cup, setting off the pulley→ 2. pulley rises and hits a lever→the lever releases the hammer→ 3. hammer falls and hits a small metal marble→ 4. marble goes down two inclined planes→ 5. marble hits another lever→ 6. lever knocks over the dominoes→ 7. tallest domino releases the pendulum→pendulum swings around to hit the cup→ 8. cup releases the wind-up car→car pushes the string of weights→ 9. weights fall off the desk→weights pull one of the wood supports→ 10. big weight falls on the stapler→stapler stables the paper.
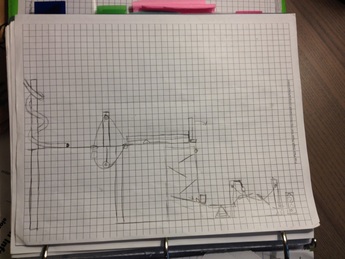
Original Schematic
|
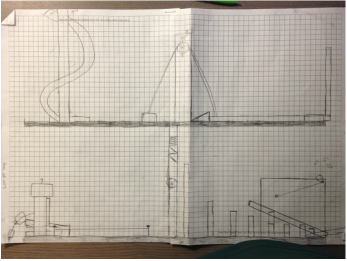
Final Schematic
|
Reflection
Rube goldberg's are a lot of fun. The one thing you need a lot of however, is time. My group was a little behind all of the other groups since the very beginning of this project. We spent almost two days trying to determine what steps we were going to use and what are end product was. We started this project at the rate of snails. Each day in class, our group would get farther and farther behind. We didn't even start our schematic until the third. Eventually, we started building and we thought we would have enough time to complete the project. That was where our group started to have problems.
We did not always agree and our opinions and views would vary. All of us thought that our ideas were the best, which we found out is not always true. Our group spent most of our time each day discussing what to do for our next step. This was not the best idea because then we didn't spend very much time building. One thing I struggled with was staying on task and being a little too controlling. I like to be in charge and take the leadership position in groups. I learned how to become a better listener and to be more aware of others opinions and ideas. Those are two valuable lessons to keep with me for the rest of my life. I believe that our whole group learned how to work as a group more efficiently. Towards the end of the project we were a whole lot more productive than at the start. We became better communicators and learned how to share our ideas clearly and concisely. All four of us were leaders, so sometimes we had arguments and liked to tell the others what to do. Luckily, we overcame this challenge by sharing our ideas and then voting on the best idea. This method helped us a lot because we were able to share what we wanted, while discovering what everyone else wanted. It also meant that everyone got to have a say on the project.
Slowly but surely, our group started to blend and work together. By the end of the project, we all knew how each person worked and how to get along. I learned a lot about myself and about the people in my group. I had a great time doing this project and am very excited to start our next one. I am positive that I will learn and grow even more than I did in while making the rube goldbergs.
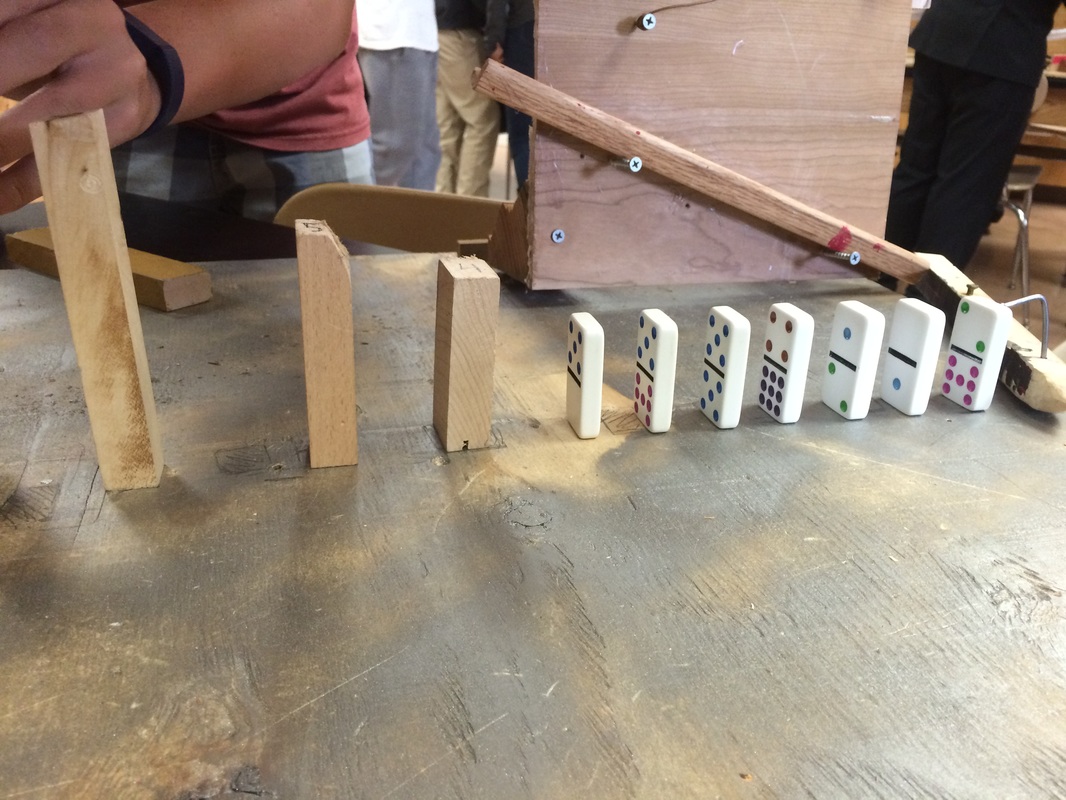
The Dominoes
|
The Pendulum
|
The String of Weights
|
